Christine Gets Crafty
DIY Tips for Framing Favorite Fabric

Some of my favorite childhood memories revolve around swimming pools, ice cream, and summer camp held at the home of my grade-school art teacher. Mornings were filled with a variety of craft projects, and we cooled off in the afternoon, eating ice cream and taking dips in her pool. I can’t recall any of the finished projects, but the joy of creating something with my own hands still lingers.
Fast forward to adulthood, where DIY crafty-type projects have become just a happy childhood memory — until COVID hit. With more time spent at home, I found myself craving something tactile and something to keep me busy. I thought, “I’ll redecorate!”
I found some beautiful, framed textile art, but the price tag stopped me in my tracks. $499 for one 24″ x 24″ piece of framed fabric? I’ll do it myself, thank you! And so, my crafty self returned.
Choosing Your Fabric
Perhaps your grandmother’s favorite scarf or a family heirloom quilt is sitting in a closet not really being enjoyed. Or maybe your favorite childhood blanket is in a drawer, and you don’t want to give it away, but it’s not being used. Get creative, and you’ll likely come across many fabric options from which to choose. I chose African mudcloth for its rough, organic nature, which I adore.
Gather Supplies
You’ll need the fabric, a seam ripper (if you’re using mudcloth or other textile with stitches), double-sided foam tape, a picture frame with mat board, and fabric scissors.
Trim Fabric to Size
First, I needed to trim the fabric to fit in my frame. The piece of mudcloth was approximately 40″ x 55″ in size, clearly larger than my 20″ x 26″ frame. I decided on the appropriate length, leaving a few inches on the top and bottom so the mat would show, then cut the fabric to the desired length.


Images by Mauricio Bergamin
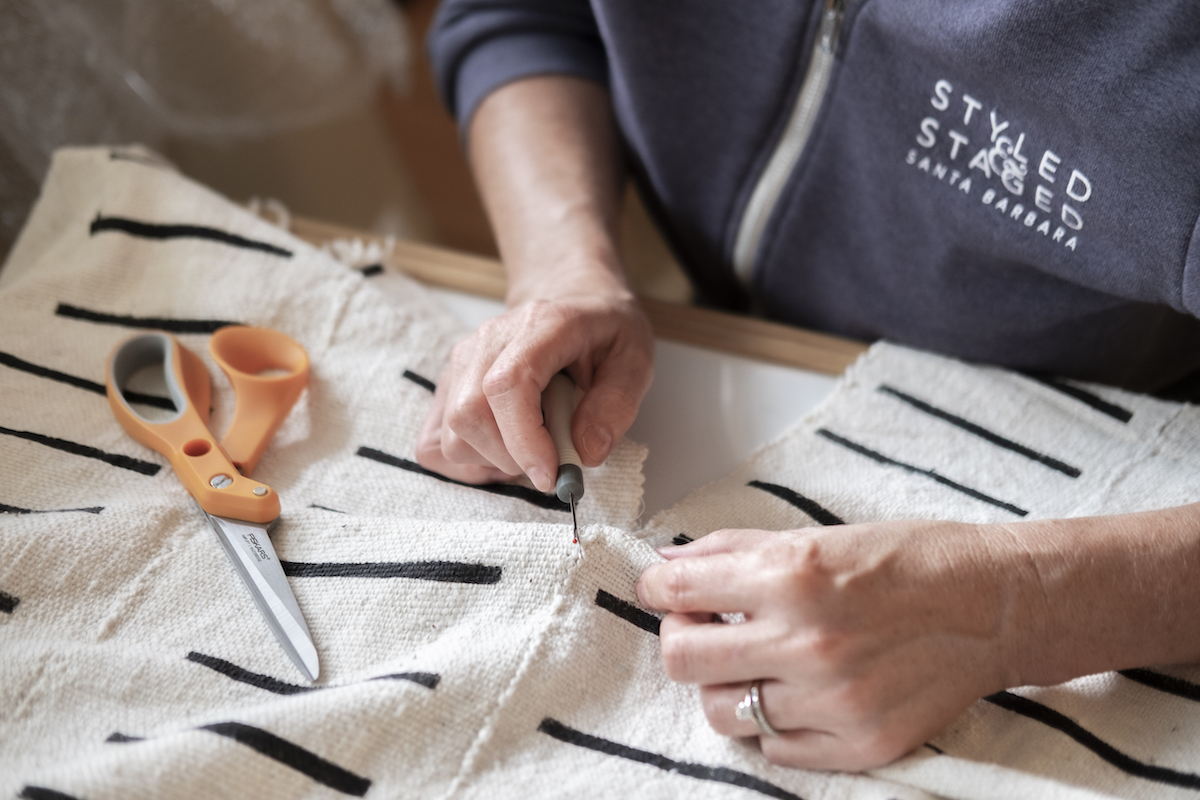
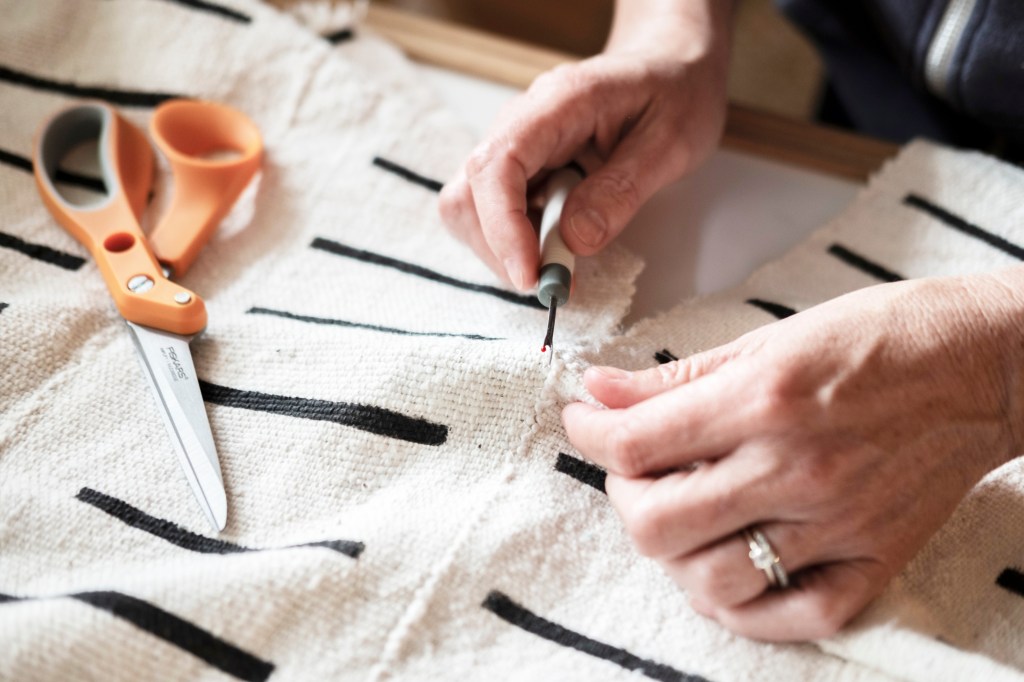
Remove Stiches
Mudcloth consists of narrow panels stitched together, so for the width, I decided to separate the panels by removing the stitches with a seam ripper (rather than cutting it with scissors). This allowed me to display the original edge of the fabric, which is one of the qualities that make this fabric so beautiful.
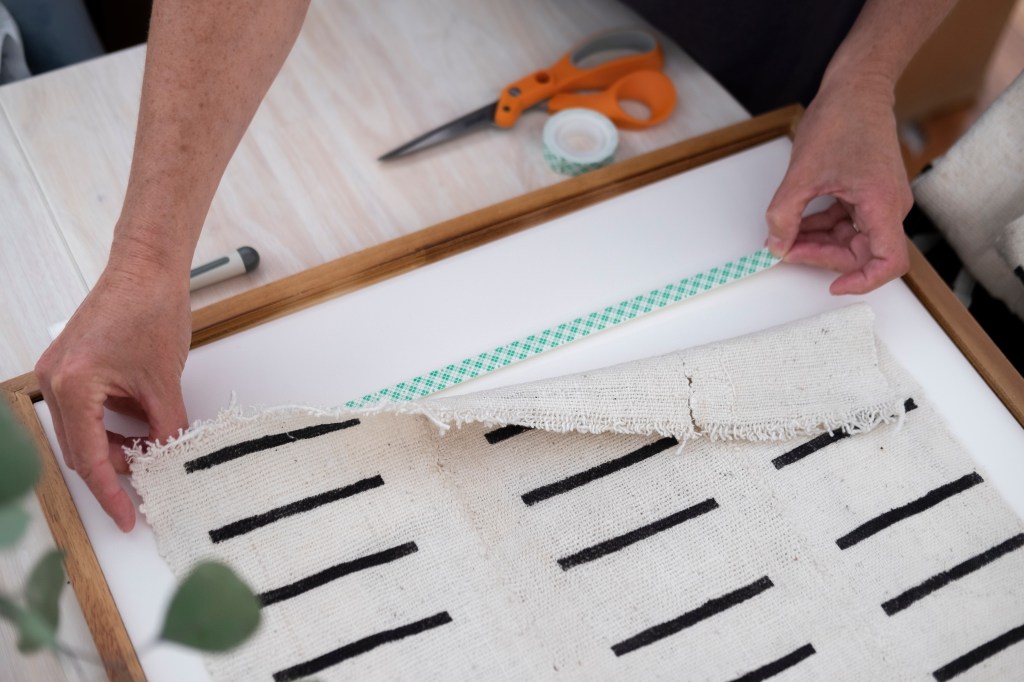
Attach Fabric to Mat Board
The frame I purchased came with a mat, so I decided to mount the fabric on top of the mat board and over the cutout (where a photo would normally go) using double-sided foam tape.
Position the fabric on the mat board, then lift about one inch of fabric along the edge and lay it over itself. Next, measure out a piece of foam tape about one-half of an inch smaller than the length or width of the side you’re about to attach. Attach the foam tape to the mat board beneath where the edge of the fabric will lay on top of it.
Once the foam tape is attached to the mat board, it will be difficult to move without tearing the mat board, so try to get it in the correct place the first time. The fabric is more forgiving, and you can gently peel the fabric off the foam tape if the fabric isn’t in the correct position.
Assemble
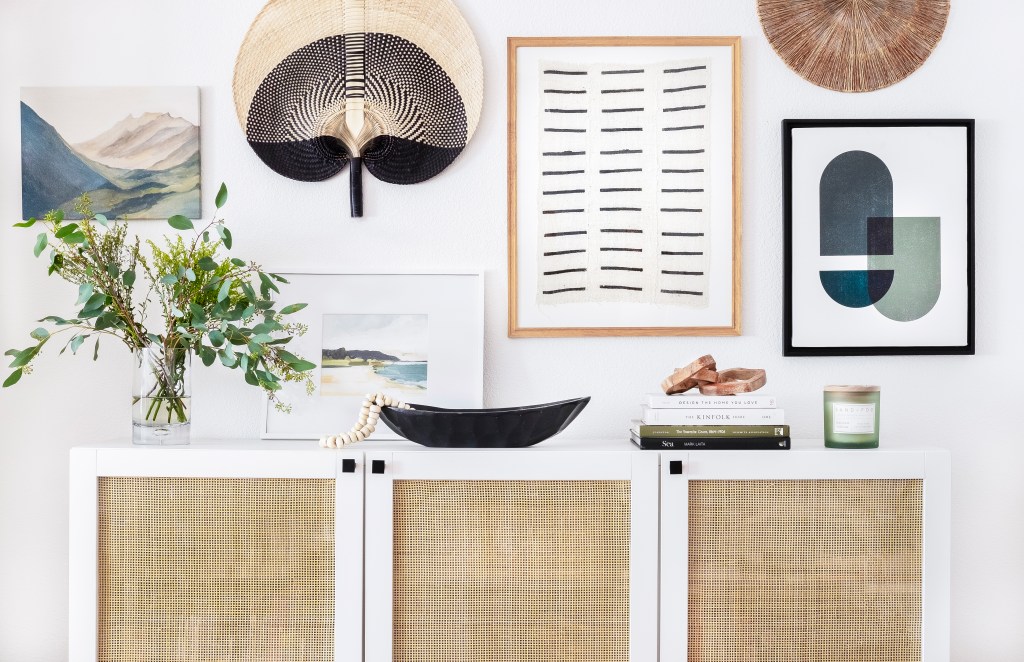
Finally, insert the mat board into the frame and assemble. Voilà! It is such an affordable way to add interesting art to any room at a fraction of the price to similar pieces sold in stores. I hung my textile framed art above my DIY cane sideboard (also a COVID project) along with some of my other favorite art pieces. I love my new gallery wall!
Christine S. Cowles is owner of Styled & Staged Santa Barbara, offering home staging and interior styling services. She is a certified Staging Design Professional™, member of Santa Barbara Association of Realtors and Real Estate Staging Association, and a proud WEV graduate. She can be reached at info@styledandstagedsb.com.
Support the Santa Barbara Independent through a long-term or a single contribution.